1 Overview
Microsoft has made OAuth authentication with Dynamics 365 Finance and Supply Chain Management the preferred security method. This article outlines the steps required to setup OAuth authentication and configure the DynamicPoint EasyEXP365 application to leverage this authentication method.
2 App Registration in Azure
- Logon to you Azure Portal
- Search for “App Registrations”

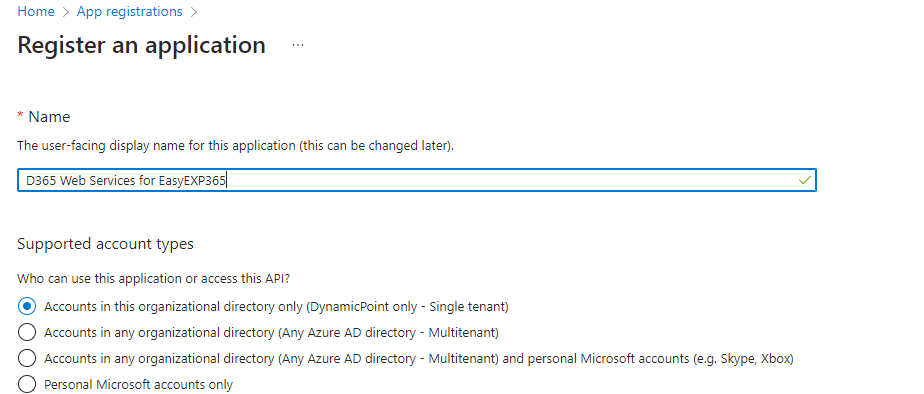
- Select New Registration
- Give the registration a logical name, such as “D365 Web Services for EasyEXP365”
- For the redirect URL, select Web and place the URL of your D365 data endpoint

- Leave all other options as default and click Register.
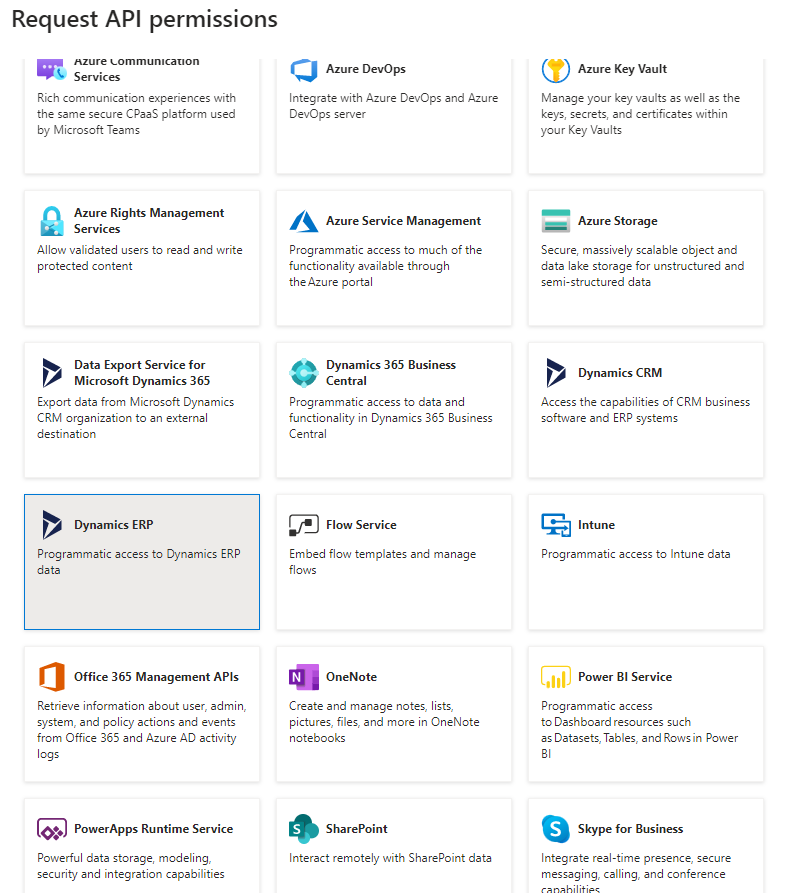
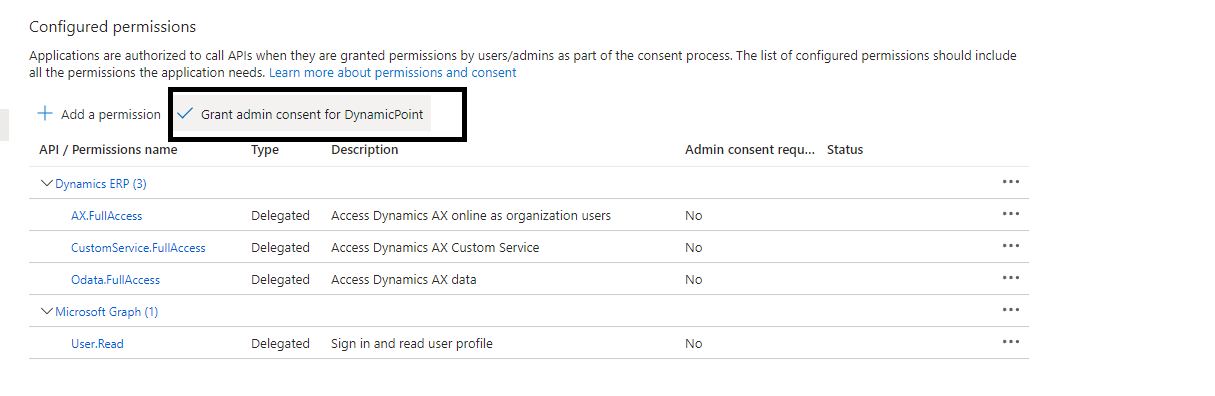
- Click API permission from the left hand navigation and Add a permission.
- Under the Microsoft APIs tab select Dynamics ERP
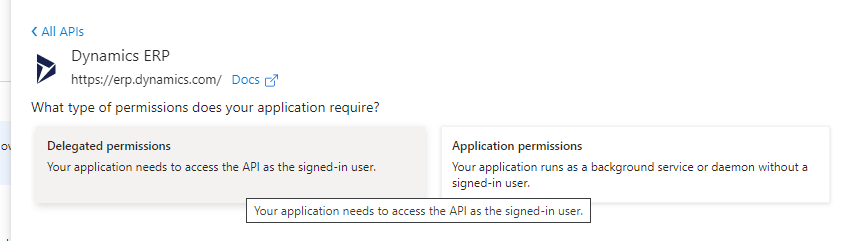
- Select Delegated Permissions
- Check AX.FullAccess, CustomService.FullAccess and Odata.FullAccess
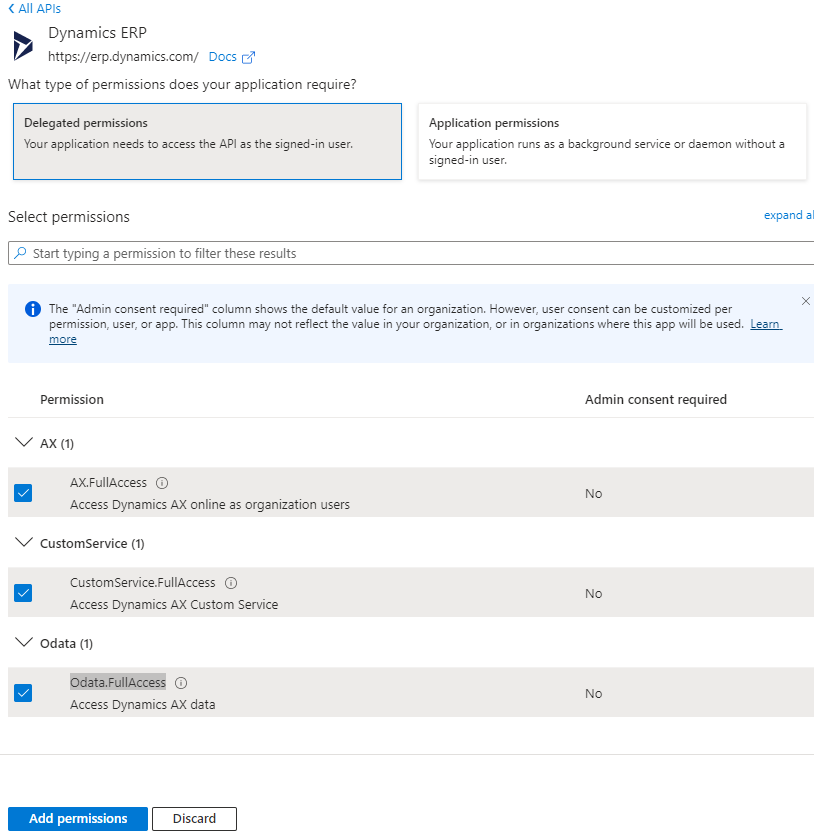
- Click Add Permissions
- Click Grant admin consent and click yes to the dialog message
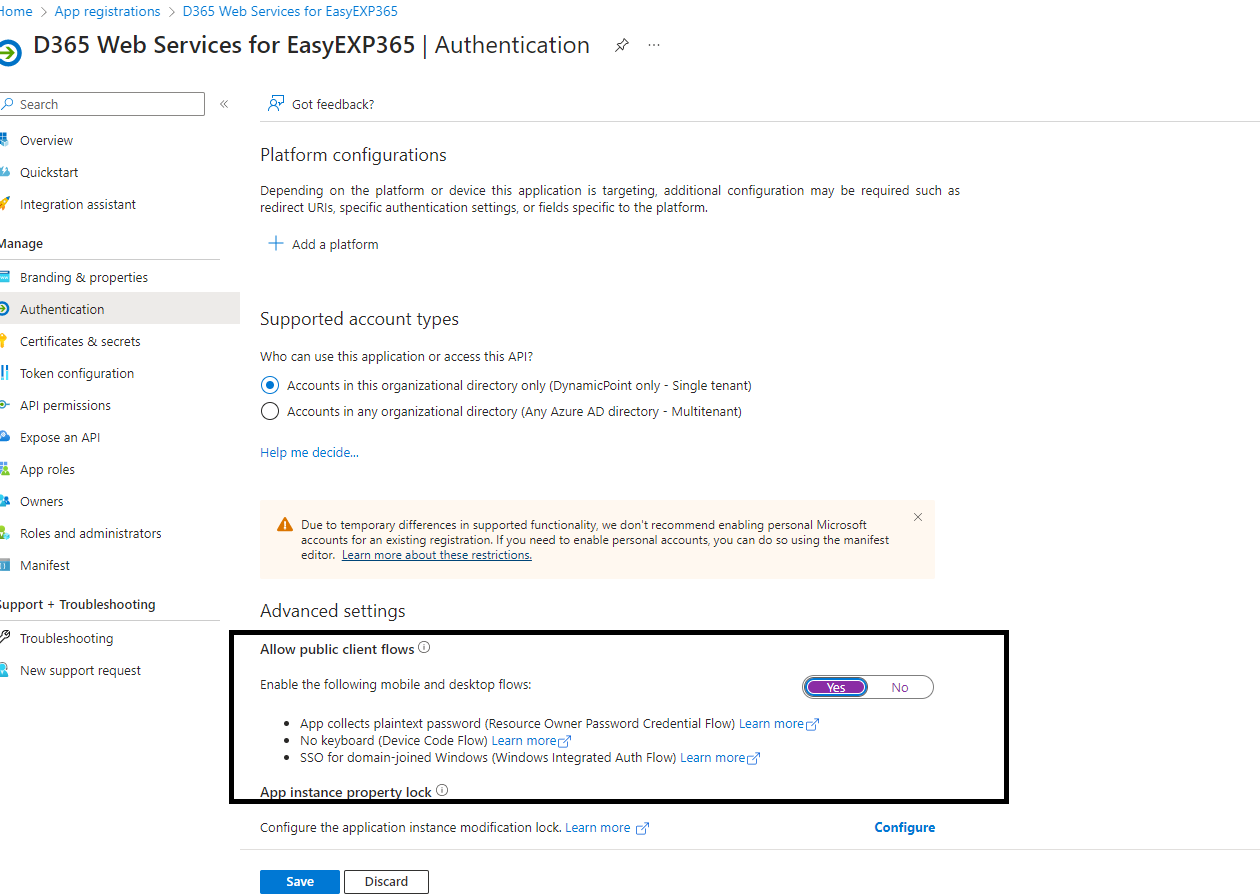
- Click on the left hand navigation to Authentication

- Change the Allow public client flows to Yes and save the page

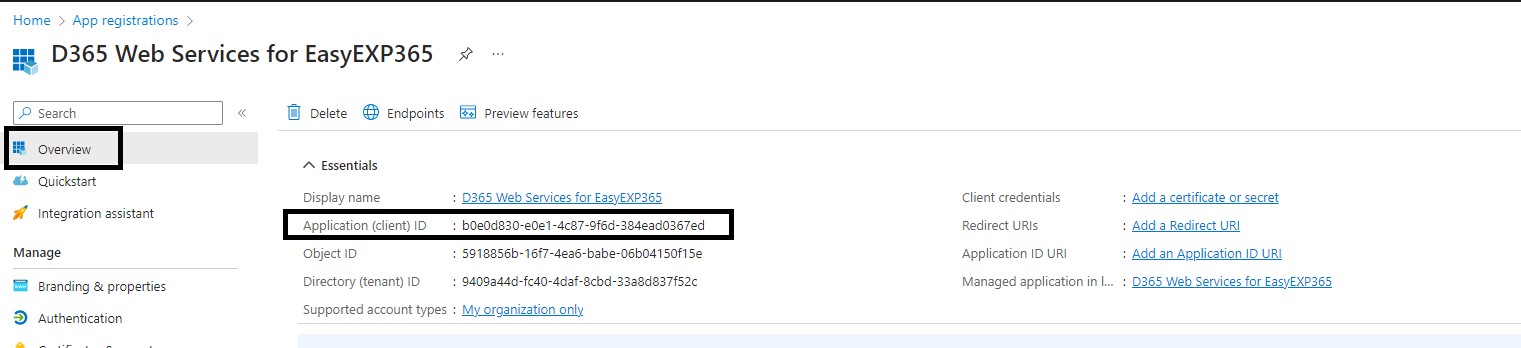
- Click back on Overview from the left hand navigation and copy the Application (client) ID. Save it to notepad such that it is available in the next step.


3 EasyEXP365
- Logon to the application as an administrator
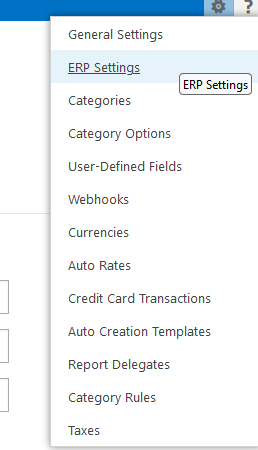
- Click the gear in the upper right corner and select ERP settings
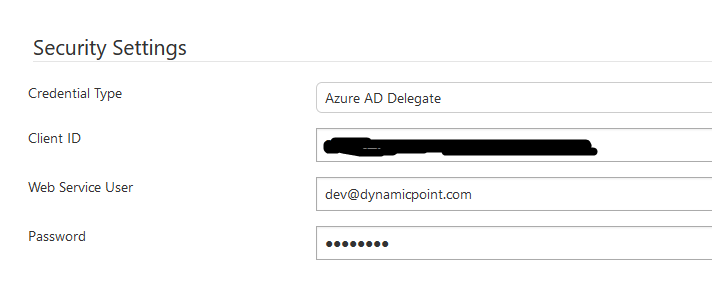
- With the Security Settings section, under Credential Type, select Azure AD Delegate

- Complete the following fields:
– Client ID – With the value copied from the registration
– Web Service User – Your D365 user as an email <example@company.com>
– Client ID – With the value copied from the registration
*Note: This account MUST be a valid D365 service user that does NOT require Multi-Factor Authentication.
– Password – The Office 365 password of the user
- Click test and ensure it is successful
- Click save
