To make a workflow cancellable in DynamicPoint’s EasyAP365 product, there are three aspects of setup. First, the metadata for the approval workflow must be captured and written back to the invoice on the SharePoint app site. Second, a new cancel workflow must be created such that it can call the metadata of the original workflow and cancel it. And lastly, a small amount of configuration must occur in the EasyAP365 app to specify the URL of the cancel workflow. This knowledgebase article details each of these steps.
1 Modifications to the Existing Workflow
Three actions must be added to your existing approval workflow. First the workflow metadata must be captured. Second it is formatted. And lastly, it is written back to the Invoice in EasyAP365. Here is an overview.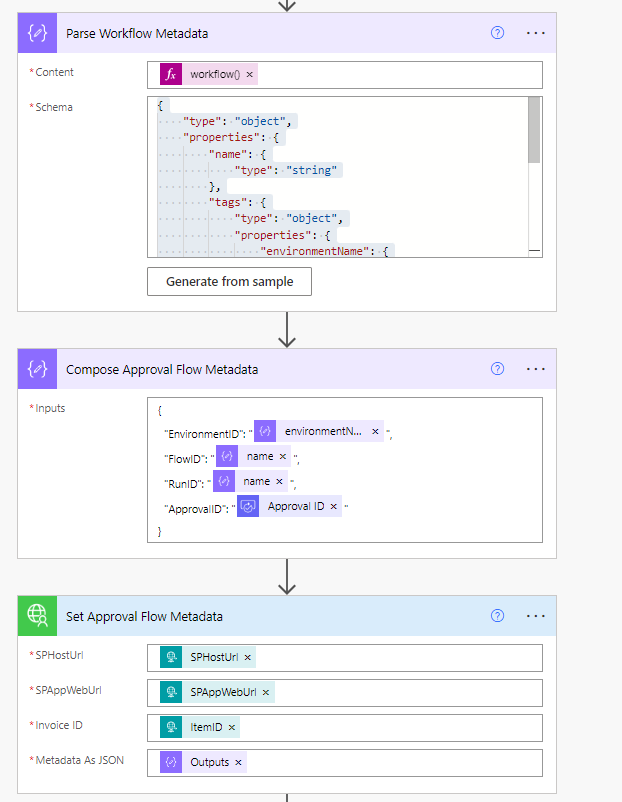
Parse Workflow Metadata
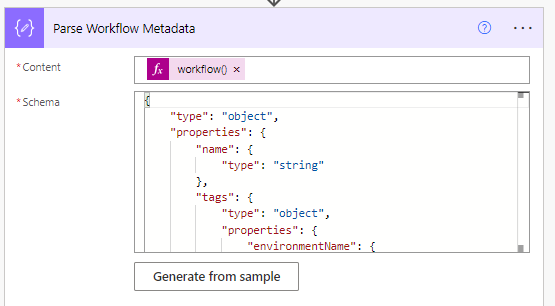
- Add a Parse JSON data operation action
- Name the action “Parse Workflow Metadata”
- For the content specify an expression and select the workflow function.
- Add the following schema: link
Compose Approval Flow Metadata
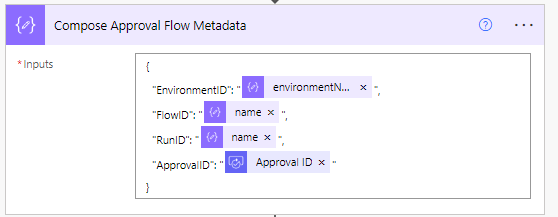
- Add a Compose JSON data operation action
- Add the following schema: link
Set Approval Flow Metadata
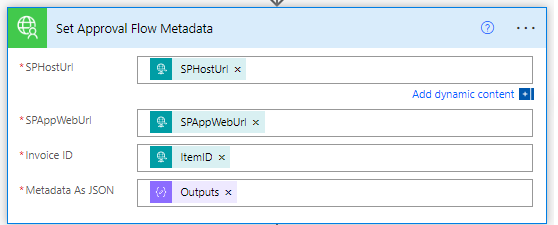
- Add a Set Approval Flow Metadata action
- Specify the values as seen in the image
2 Create New Cancel Workflow
A new Power Automate workflow will be created that is called to cancel the running flow. It will pass all the run metadata that was captured in the previous step. The workflow is very simple and will contain the following two steps:
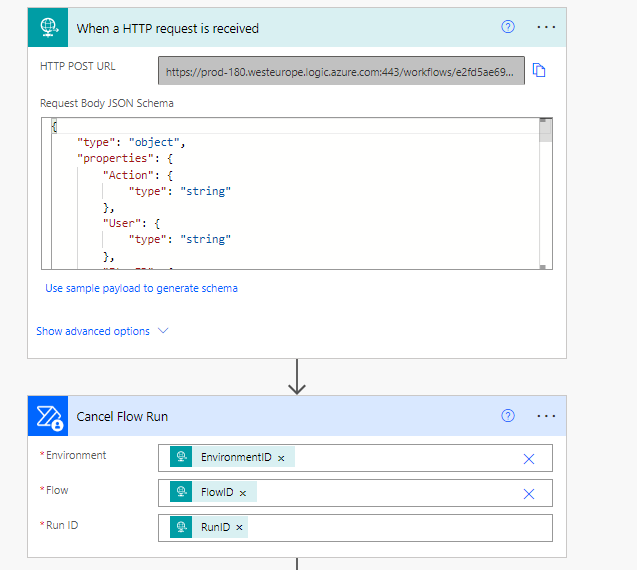
When a HTTP request is received
- For the trigger use the http request
- Use the following schema: link
Cancel Flow Run
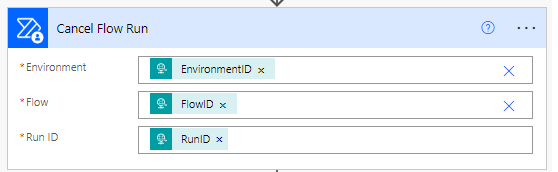
- Add a Cancel Flow Run action
- Specify the values as seen in the image
3 EasyAP365 Configuration
The last step is to configure EasyAP365 to call the new cancel workflow.
- From the admin section, navigate to webhooks
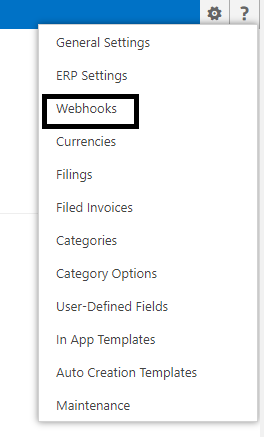
- Create a new webhook
- Specify the following fields:
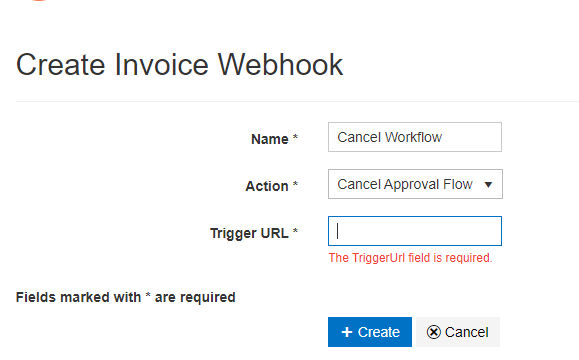
- Name – Name the workflow what you want that is descriptive
- Action – Select Cancel Approval Flow
- Trigger URL – Specify the http trigger URL from the Create New Cancel Workflow step
Testing
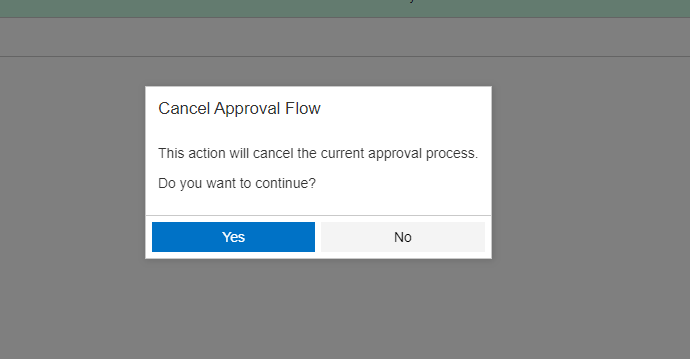
After the configuration is complete, you will see a new icon when an invoice is in a submitted status:

Clicking the cancel will prompt the user.
The workflow will return to a not submitted status.