1 Overview
This document provides an in-depth description of how to configure and administer the DynamicPoint Employee Expense application, EasyEXP365. Its target audience is the set of individuals tasked with the initial installation, configuration and ongoing maintenance of the application.
2 Settings
When installed, the application creates its own group of configuration pages. These pages are used to configure system-level settings that impact how the application functions within the client environment.
Accessing Settings
To access Settings, complete the following steps:
- Access the SharePoint site where the Expense Management App has been installed.
- Select site contents and the DynamicPoint Expense Management app.
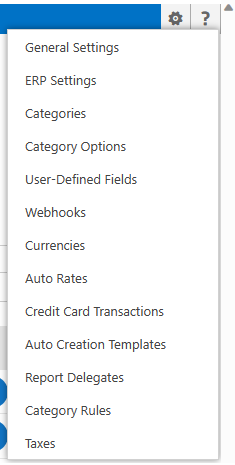
- Select the gear icon
General Settings
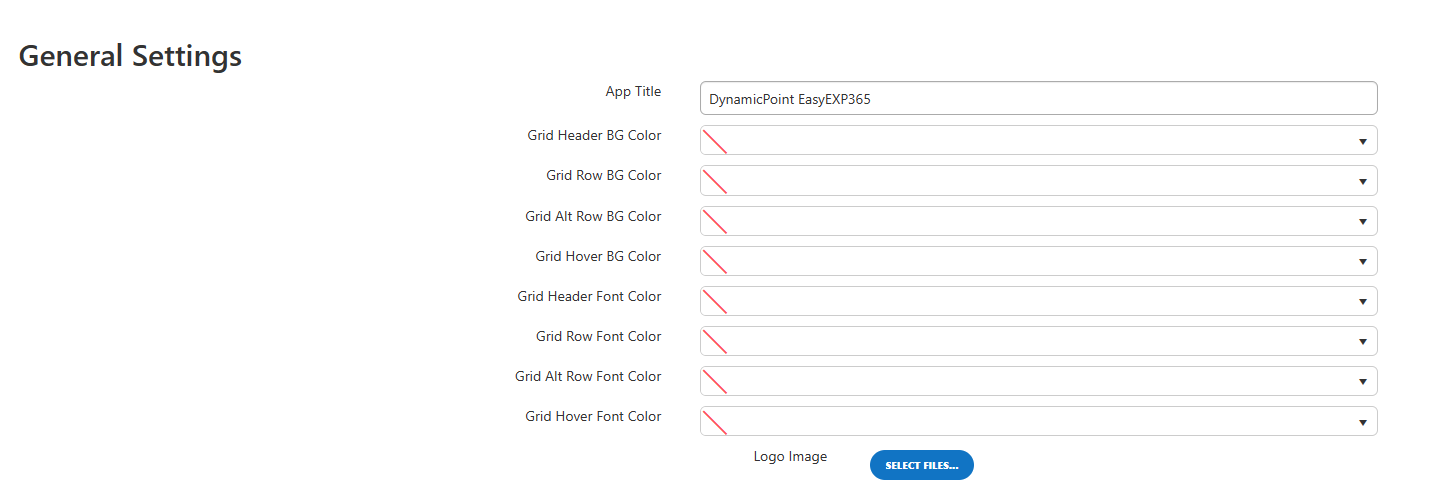
The General Settings page is used to configure the desired display of the Expense Management pages within the application.
Fields
- App Title
Define the title of your application.
- Grid Header BG Color
Defines the background color of the heading row of the parent and child grid.
- Grid Row BG Color
Defines the background color of the rows of the parent and child grid.
- Grid Alt Row BG Color
Defines the background color of the alternating row of the parent and child grid.
- Grid Hover BG Color
Defines the background color of the row over which is the mouse pointer of the parent and child grid.
- Grid Header Font Color
Defines the font color of the heading row of the parent and child grid.
- Grid Row Font Color
Defines the font color of the rows of the parent and child grid.
- Grid Alt Row Font Color
Defines the font color of the alternating row of the parent and child grid.
- Grid Hover Font Color
Defines the font color of the row over which is the mouse pointer of the parent and child grid. - Logo Image
Add an icon to the application.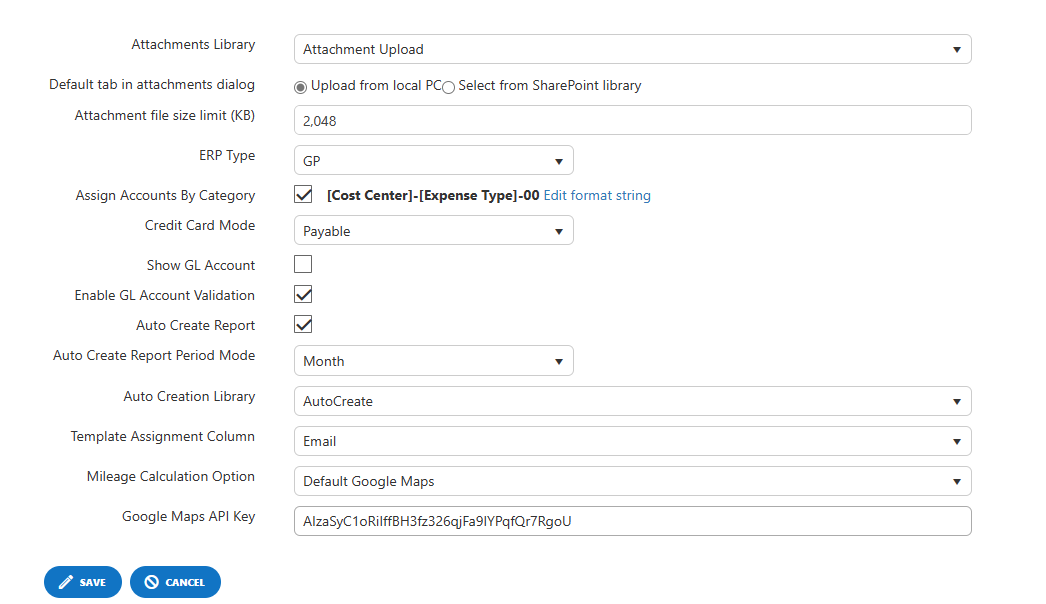
- Attachments Library
Select the SharePoint library where expense receipts will be stored prior to upload to the Expense Management app.
- Default tab in attachments dialog
Defines the default attachment location when selecting an attachment in the Expense Management app.
- Attachment file size limit (KB)
Defines the file size limit.
- ERP Type
Select the ERP you are using.
- Assign Accounts By Category
Define if you want to dynamically assign GL accounts based on category configuration. If selected, use the account builder to determine your account assignment.
- Credit Card Mode
Define what integration option is desired for credit card transactions. The choices are as follows:
-
- None – Credit cards are not used
- Report Only – Credit cards are used but ERP integration is not desired
- Employee Reimbursable – Credit cards entries are reimbursed to employees
- General Ledger – Credit card entries create GL transactions
- Payable – Credit card entries create a payable to the credit card vendor
- Show GL Account
Display the resulting GL account on expense line items to end users
- Enable GL Account Validation
Validate the resulting GL account on expense items by querying the ERP to ensure the account exists.
- Auto Create Report
Monitor a given SharePoint library to auto create expense reports and add line items
- Auto Create Report Period Mode
Determine if reports are auto-created for a monthly or weekly time basis
- Auto Creation Library
Select the library to be used for the auto creation of expense reports
- Template Assignment Column
The column used in the auto creation library to assign the auto creation template
- Mileage Calculation Option
Define how mileage reimbursement is to be calculated. The choices are as follows:- Manual – Travel distance is to be entered manually
- Default Google Maps – Default the mileage calculated by Google Maps but allow the user to edit it
- Google Maps Lock – Default the mileage calculated by Google Maps but don’t allow the user to edit it
- Google Maps API Key
Provided by DynamicPoint
ERP Settings
The ERP Settings page is used to designate the ERP settings used to retrieve data from the ERP. The options will vary based on the ERP selected.
Dynamics GP
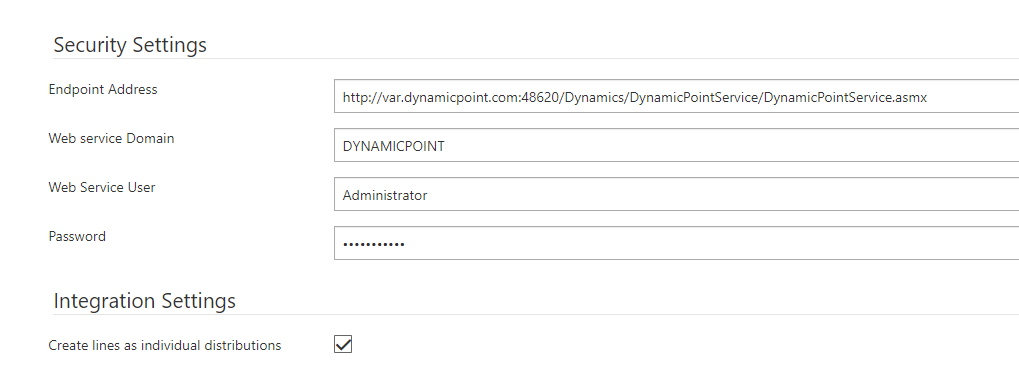
Security Settings
- Endpoint Address
URL of the path to the ERP web service API.
- Web Service Domain
This is the domain for the account that will be used when interacting with the Web Service API.
- Web Service User
This is the domain account that will be used when interacting with the ERP Web Services.
- Password
This is the password of the domain account that will be used when interacting with the ERP Web Services.
- Create lines as individual distributions
GL line items will be consolidated for each unique GL or integrated as individual line items.
Company Settings

Fields
- Category Option
A drop down of all company defined category options will be available.
- Company ID
The Company ID of the database the expense report will integrate with.
- Inter ID
The Inter ID of the database the expense report will integrate with.
- Payables Account
Enter the payables account.
- Credit Card Payable Account
The credit card offset account. Used if the credit card mode is set to GL or Payable.
- Credit Card Vendor ID
The vendor used if credit card mode is set to Payable.
- Default Currency
Select currency to default if not defined on the vendor card. Currencies must be configured in the Administration Links in order to be available in the drop down.
Dynamics NAV/BC
Fields
Security Settings
- Credential Type
Specify the method that will be used to authenticate to NAV or Business Central.
- Account
The integration account that will be leveraged to connect to the ERP.
- Password
The password for the integration user.
- Client ID
The client ID of the Azure App Registration.
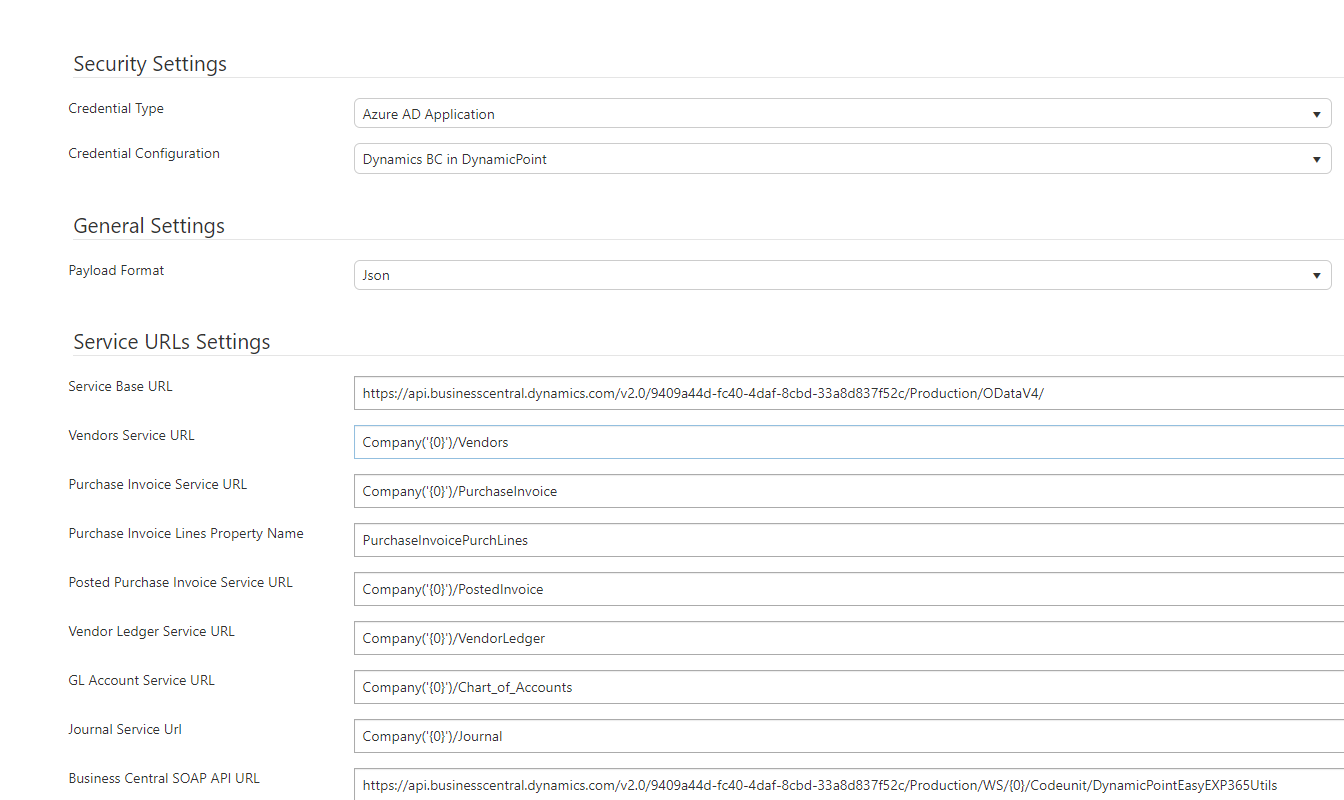
General Settings

- Payload Format
The format of the integration file that will be passed to the Business Central API.
Service URLs Settings
URL endpoints can be found here.
You will also have to install the applicable BC extensions which instructions can be found here.
Company Settings
- Category Option
A drop down of all company defined category options will be available. Required.
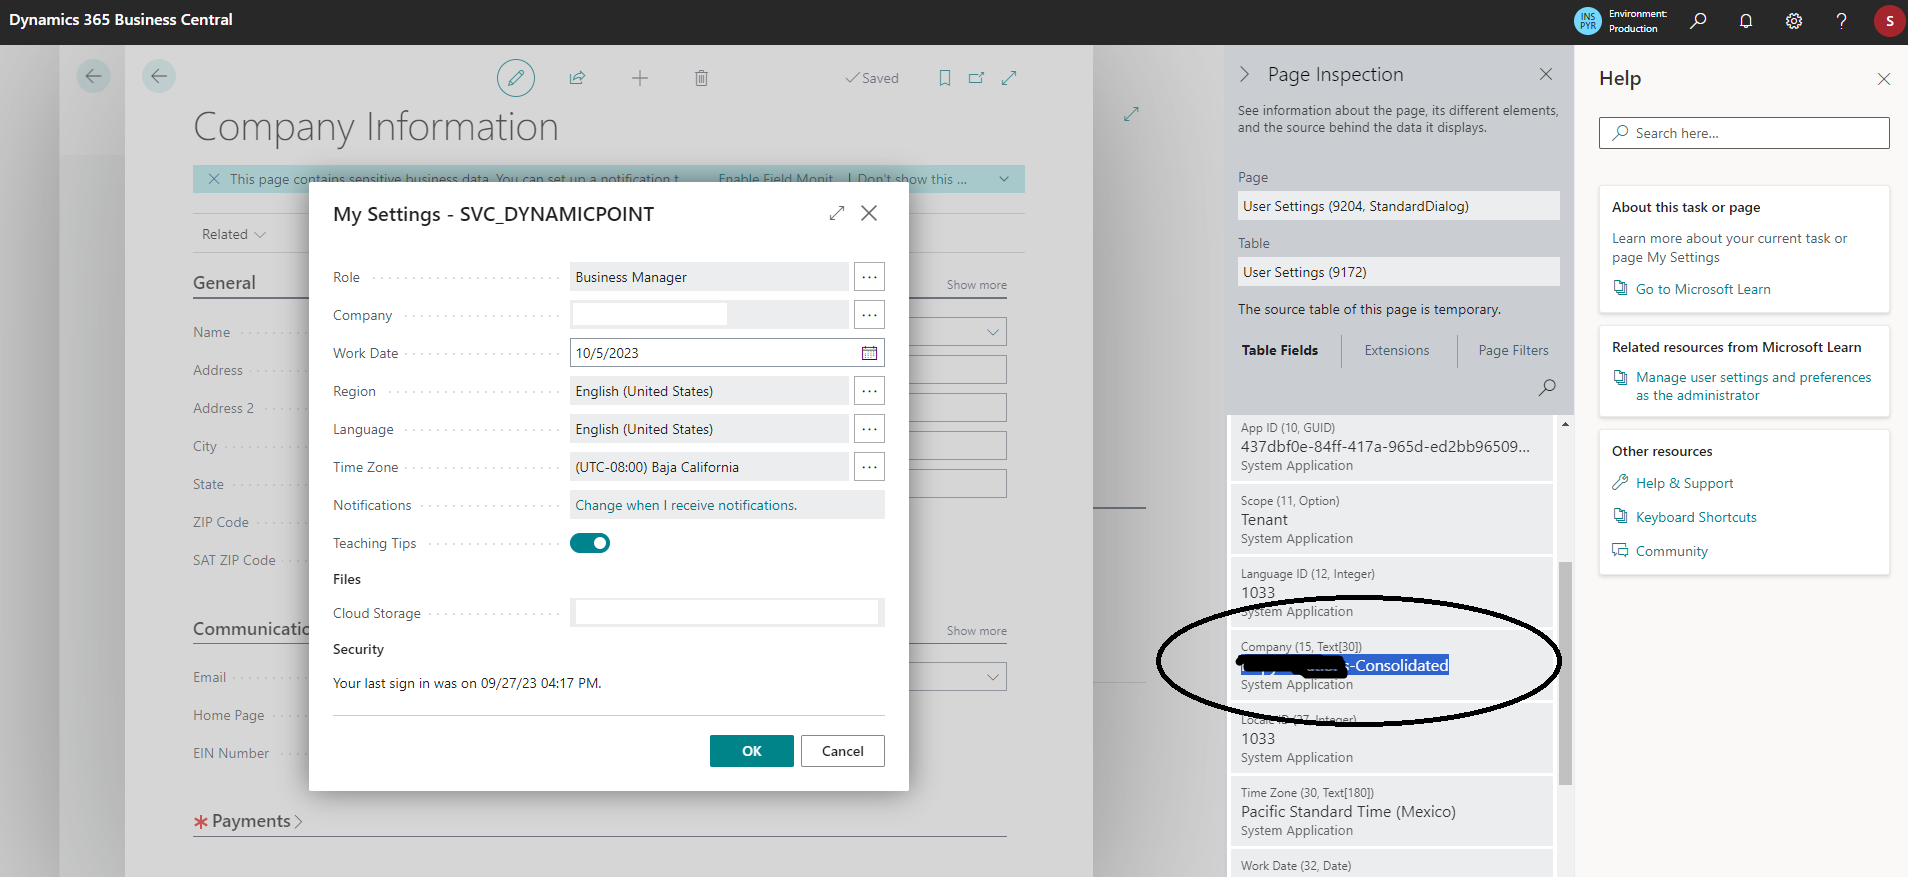
- Company ID
This can be obtained by navigating to the My Settings Page within Business Central. From there go to Help -> Page Inspection.
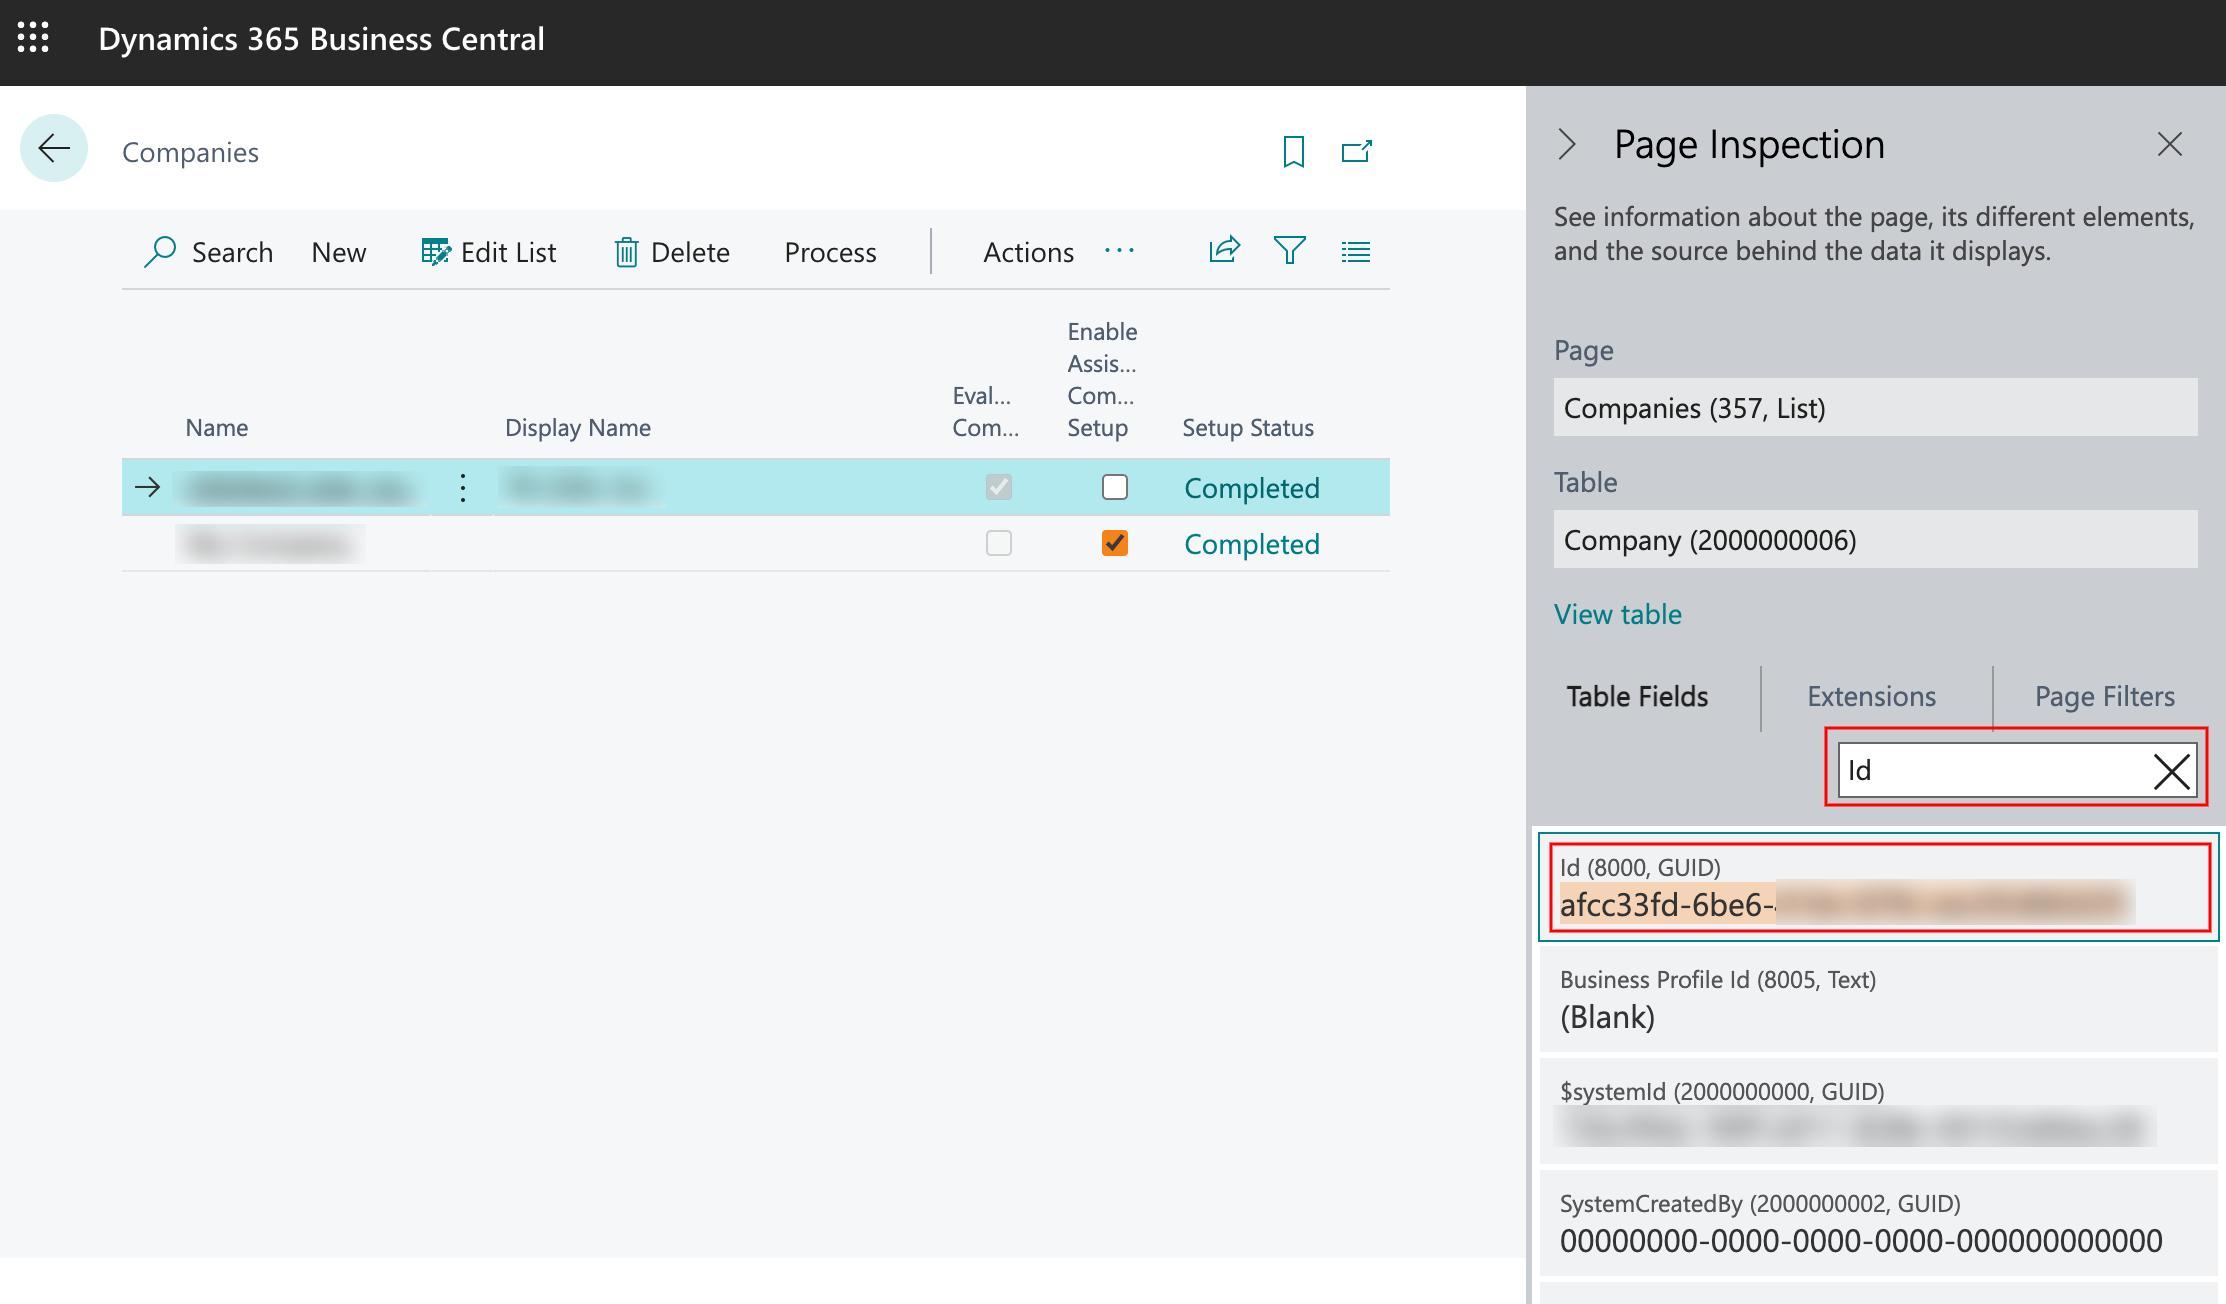
- Inter ID
To find your inter ID, follow these steps:
– Log in to your Business Central account and navigate to the Companies tab
– Click the company you want to use
– Click the question mark button on the top right corner and select Help & Support
– Under the troubleshooting section, click Inspect pages and data
– Enter ID in the search field and the first field contains your company ID
- Payables Account
Enter the payables account.
- Credit Card Payable Account
The credit card offset account. Used if the credit card mode is set to GL or Payable.
- Credit Card Vendor ID
The vendor used if credit card mode is set to Payable.
- Default Currency
Select currency to default if not defined on the vendor card. Currencies must be configured in the Administration Links in order to be available in the drop down.
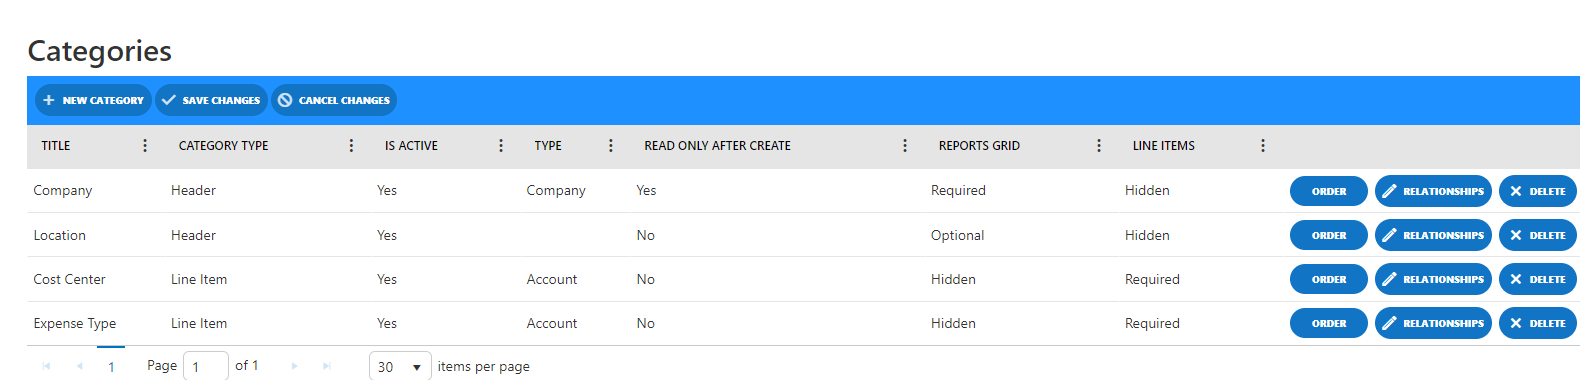
Categories
Categories define the building blocks of what is used to create an expense report. They will most often be related to general ledger segments, dimensions or company values, but this is not required.
Fields
- Title
The name of the category.
- Category Type
Denotes if this category is available on the header or line item of an expense report. If line item override is selected, the category will be selected on the header and default for line items, but can be overwritten.
- Is Active
Denotes if this category is active or not.
- Type
The following options are available:
-
- Company – Category values will be assigned on the header of the expense and correspond to the database the expense report will be integrated with. One Category with this type is required.
- Account – Category values will be assigned on the allocation items. Required if assigning the GL accounts by category.
- Dimension 1-8 – Category values will be assigned on the allocation items. Assignment of such will integrate with the corresponding Dimension fields in BC/NAV
- Workflow – Category values will be assigned on the header of the expense. This type of category can be used to configure workflow when a 1-1 relationship with an expense report and an approval path is desired.
- Read Only After Create
If set to yes, if the value for this category is selected then the selection will be read only. The report must be deleted for the value to be changed. Reserved typically for the company. - Reports Grid
Define if this category is required, optional or hidden on the main report grid. - Line Items
Define if this category is required, optional or hidden on the expense report line items.
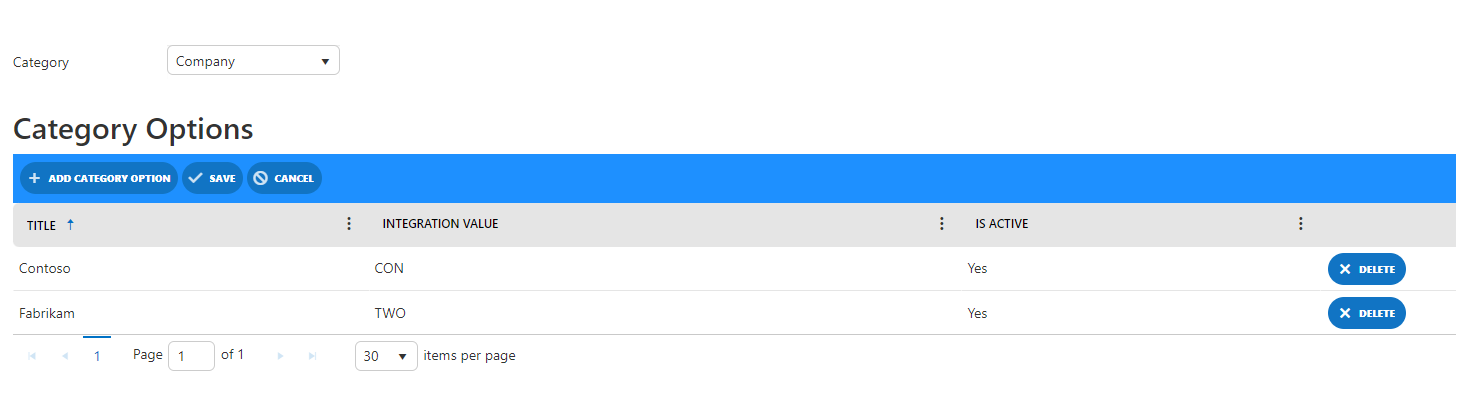
Category Options
Category Options is used to manage the creation of category options. Prior to this configuration occurring, the categories must exist in the Category page as described in the related section in this document. Categories should not be edited or deleted after configuring Category Options.
Fields
- Title
The name of the category option.
- Integration Value
The associated GL account, dimension or company code for the given option. This value will be used for ERP integration.
- Active
Denotes if this category option is active or not.
User Defined Fields
User defined fields can be added to capture non standard fields. They can be specific to a category or always present.

- Title
Enter the text of your user defined field.
- Target Type
Define where the UDF will be visible. Options include Expense Report, Expense Item, Auto Item or Credit Card Item.
- Field Type
The following options are available.
-
- Text
- Note
- Boolean
- DateTime
- Number
- People Picker
- Category
If selected, the UDF will only show for the category specified.
- Category Option
If selected, the UDF will only show for the category option specified.
- Required
Select Yes or No.
- Active
Select Yes or No.
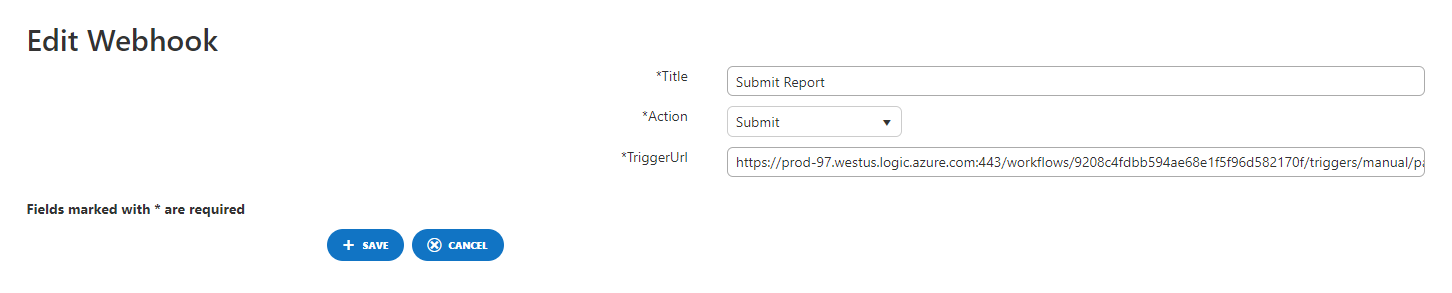
Webhooks
The Webhooks page is used to enable connection to Microsoft’s Power Automate in order to set up approval workflow if desired. This functionality is not required if submitting an expense report directly to an ERP where no workflow is required.
Fields
- Name
The name of the webhook. Required
- Action
The following options are available. Required
-
- None
- Create
- Edit / Save
- Submit
- Review
- Trigger URL
This will be the HTTP post url supplied in the Power Automate flow.

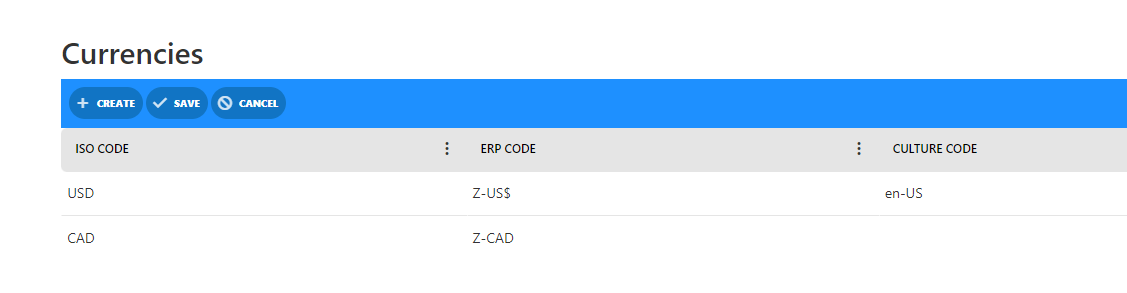
Currencies
The Currencies page is used to configure those applicable currencies for which expense reports will be created.
Fields
- ISO Code
ISO Code as defined for the currency.
- ERP Code
The currency ID that will be integrated with the ERP.
- Culture Code
Culture Code for Currency.
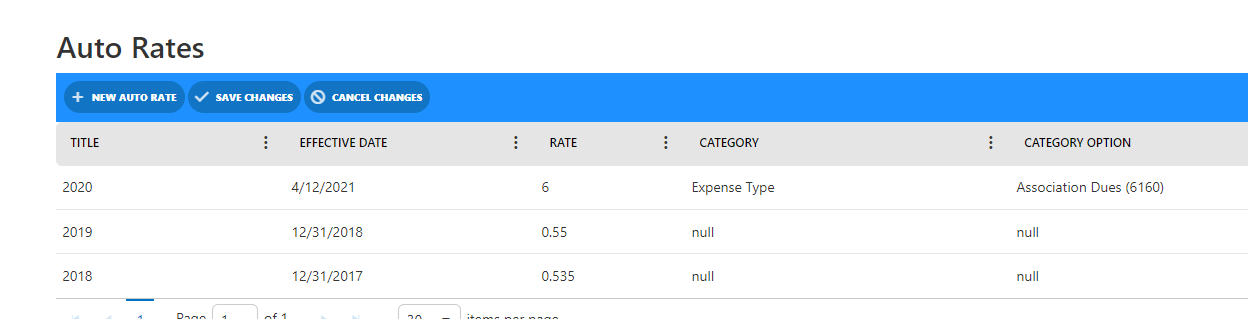
Auto Rates
Auto rates are used to determine the reimbursement amount for auto travel.
Fields
- Title
The name of the rate - Effective Date
The date the auto rate will be used by the application. This field is compared with the date of the expense transaction. - Rate
The rate of reimbursement for each unit of travel incurred. - Category
if different reimbursement rates are configured for different category options, a category can be specified to apply the specific rate. - Category Option
if different reimbursement rates are configured for different category options, a category can be specified to apply the specific rate.
Credit Card Transactions
The credit card transaction list shows the list of charges that have been brought in from the credit card vendor but have not yet been processed. If they are selected on a report, then the Is Available flag will show no. After integration credit card transactions are removed from the list.
![]()
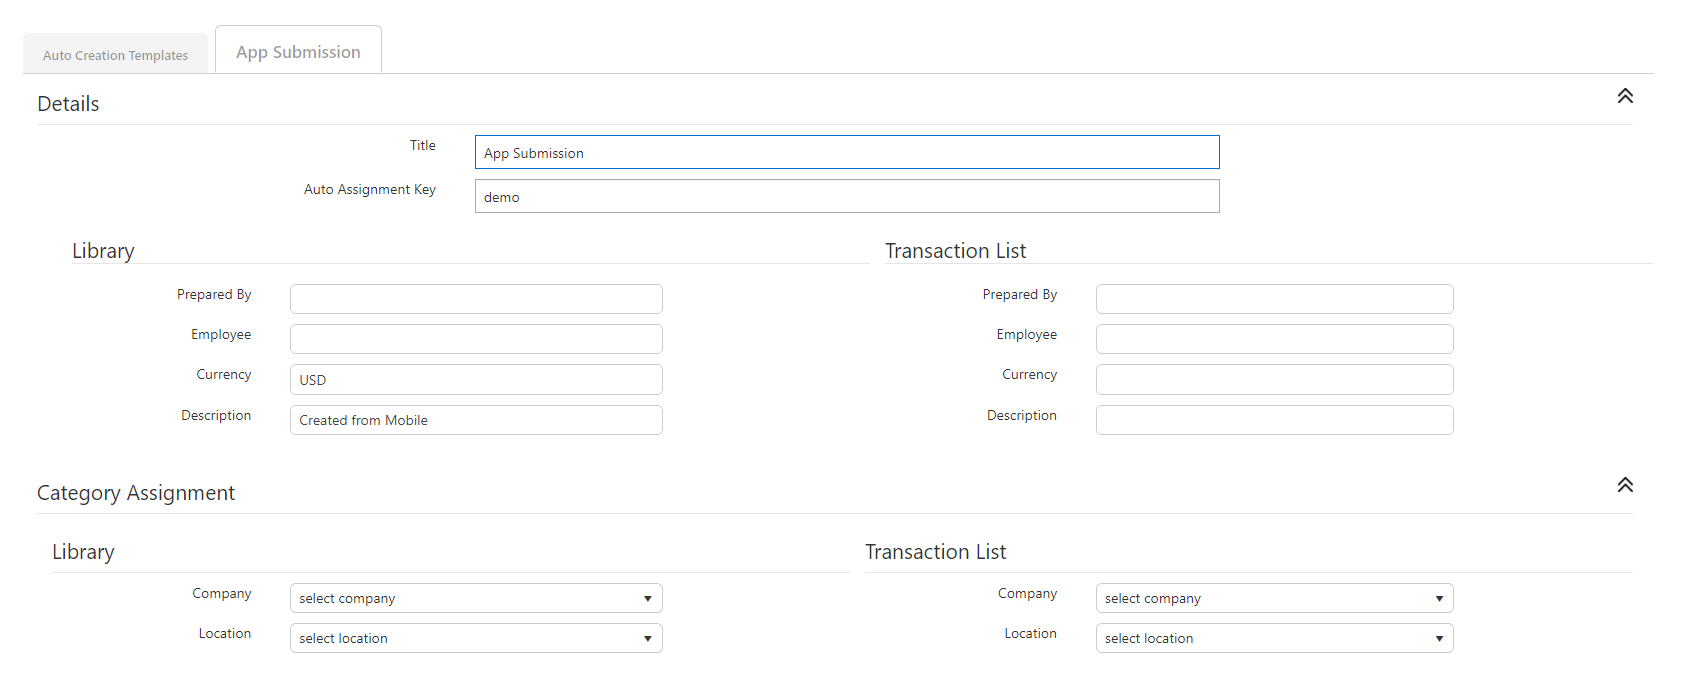
Auto Creation Templates
Auto Creation Templates are used to automate the creation of expense reports in the Expense Management application from the Attachment Library. The field, Auto Create Report, found in General Settings must be selected to use this functionality. Prior to this configuration occurring, the categories options must exist in the related section in this document.
Fields
- Title
The name of the template.
- Auto Assignment Key
The trigger field that will be matched to the receipt library in determining which auto-create template is applied.
- Library
All the fields in the library column will be used in auto creating a report if the creation is triggered by a receipt within the receipt library.
- Transaction List
All the fields in the transaction list column will be used in auto creating a report if the creation is triggered by a transaction within the credit card list.
All other fields represent the fields that are captured on expense, auto or credit card items. They can either be defaulted or mapped to values in the receipt library.
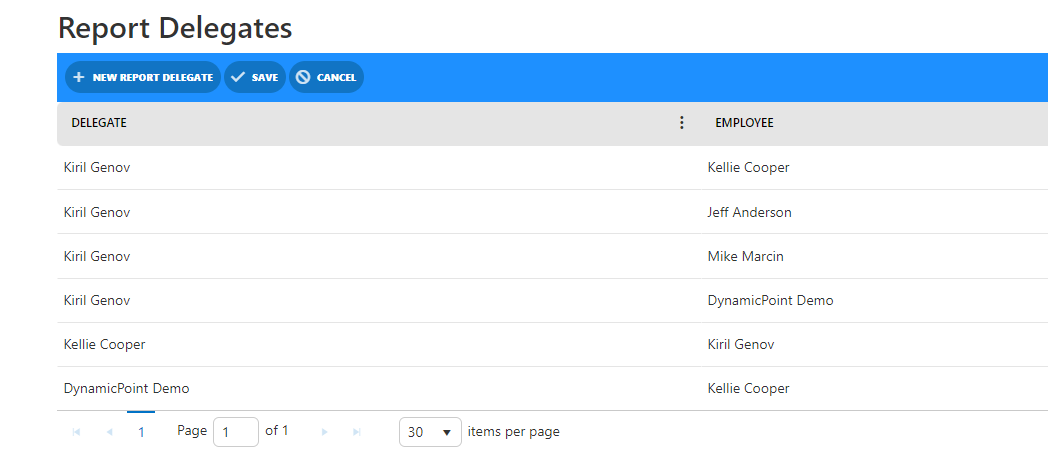
Report Delegates
Report delegates are used such that employees can create expense reports on the behalf of other employees. This allows the workflow to execute as if the user actually submitted the report to workflow as themselves.
Fields
- Delegate
The person who is delegated responsibility to create an expense report on another’s behalf.
- Employee
The person who the delegate has the ability to create the report for.
Category Rules
Category rules enforce company policies in the creation of expense reports. They can be used to default entries as well as require certain actions.

Fields
- Rule Target
The area of the expense report in which the category rule will be evaluated. This includes Expense Report, Expense Item, Auto Item and Credit Card Item.
- Rule Type
The type of category rule that is being applied. The following options exist:- Auto Assign – A value will be applied automatically and can’t be changed by the user.
- Default Assign – A value will be applied automatically and can be changed by the user.
- Default Assign by Group – A value will be applied automatically based on a user’s membership to a SharePoint group and can be changed by the user.
- User Property Auto Assign – A value will be applied automatically from a user’s profile and can’t be changed by the user.
- User Property Default Assign – A value will be applied automatically from a user’s profile and can be changed by the user.
- Require Attachment – The rule will enforce the inclusion of an attachment
- Max Amount – The rule will enforce an amount that cannot be exceeded
- Fixed Amount – The rule will enforce an amount that cannot be changed
- Category
If selected, the rule will only be applied to the specified category. - Category Option
If selected, the rule will only be applied to the specified category option. - Amount
Used by Max and Fixed Amount types to specify the amount. - Configuration Value
Used to specify the default value to be applied or group for which the rule is to be assessed. - Allow Submit
Determines if the rule will prevent submission or just warn the user.
Taxes
Used for capturing GST or other tax amounts on expense reports.